So there I was, tasked with making the coffee table for our living room. The one that everyone will see and unfairly judge my life's choices on. Fortunately, my wife has fantastic taste and helped plan out what our coffee table should look like. We ultimately decided on a herringbone pattern. Why? Da faka look good das why.
Crate & Barrel makes a pretty nice coffee table. Chevron/herringbone pattern top on a metal box frame. Modern and rustic all in one nice package. Holy FK that's nice. How much does it cost? Only $500? Oh...hah....that's not expensive at all.....
 |
| Crate & Barrel expensive ass coffee table that ill never ever buy.jpg |
CRAP ON THEM, I CAN BUILD THAT!
Because Portland is super hip and edgy #af, we naturally have a plethora of reclaimed lumber yards. It's doesn't get much more #hipster and #rustic than it does in #PDX. The lumber yard I frequent is Salvage Works.
The fine craftspeople at Salvage Works are super nice and usually very helpful. So we picked out their WOW wall cladding since it was literally ready to go. No prep work needed.
 |
| Let the #hipster flow through your wallet. |
The only complaint I have is that anytime I ask about getting my wood milled (squared and straightened, also phrasing), they always give me some vague ass answer about how they kinda do it but not really. For those that don't know, to mill wood, you need a jointer and planer. Both of these tools are kind of big and expensive.
I don't have the room or money to be buying all these fancy big boy tools. I'M DOING THIS TO SAVE MONEY DAMMIT! So I'm kinda of screwed if I need some straight, hard, and long wood.
 |
| Wooden chairs.jpg |
FK IT! #rustic here we come.
So! I got a piece of 5/8" plywood cut to 4x2. Fortunately, the plywood was flat and had no warping. Big shout out to the expert wood cutters at Homé Dépot.
I used a miter saw to make 45 degree angles for my herringbone pattern. I then used a bit of wood glue and finishing nails to keep things secure. It came out pretty damn nice if I say so myself.
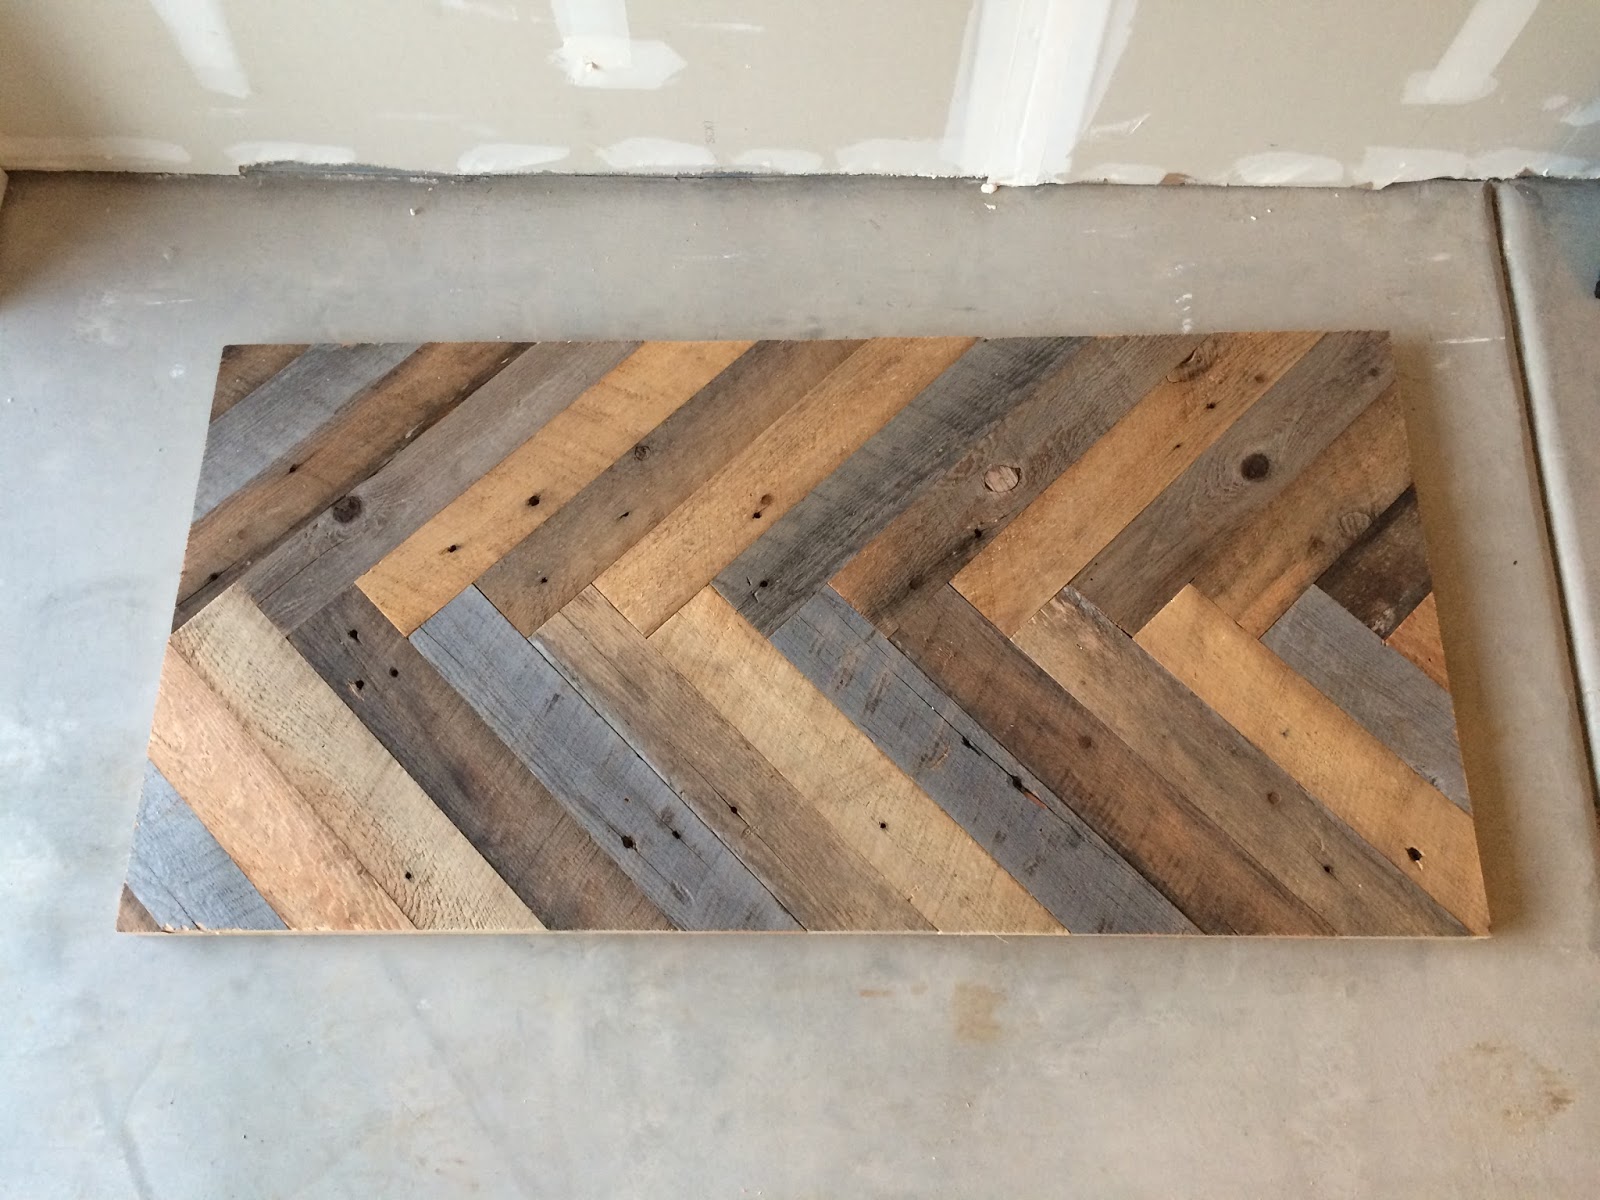 |
| pretty damn nice coffee table bro.jpg |
 |
| ikr, its pretty #rustic namsayn.png |
 |
| #vegan |
I then added some edging to the edges to protect the edges. Before attaching them to the table top, I sanded and stained them. Wouldn't want to ruin any of that natural rustic padoodle on the reclaimed wood. For the stain, my wife suggested using Cece Caldwell's stain. Their products are the bees knees I tell ya. No nasty fumes to deal with and the stain dries suuuuuuuuuuuuuuuuper fast. Try them on sometime.
 |
| dang, that came out pretty good |
My mitered corners came out soooo friggen perfect. I made sure to measure everything 3 times. That way, I couldn't POSSIBLY screw up. Let's see how I did...
 |
| UGGGGHHHHHHHHHHHHHHHHHHHHHHHHHHHHHH |
After attaching the legs and edging, I filled the big holes with epoxy. Why epoxy? Epoxy hardens real hard and is clear. That will help prevent crumbs/liquids from getting stuck in holes. No one likes a gross ass table covered with leftover bits of food in every crack.
All that was left was finishing. We don't want to damage the beautiful natural patricia of the reclaimed wood. So again, no stain and only very light sanding. My wife had this wax from, you guessed it, Cece Caldwell. Like their stain, very easy to apply and looks real gud. The wax helps waterproof it a bit and works like a sealant.
I don't have any pictures of that but just imagine me brushing some stuff on the wood.
Here is the finished product...
 |
| oh yes! |
 |
| YES! GIVE ME MOOOORE! |
 |
| geometric thingies for added #portlandness |
$64 for the WOW wood
$40 for hairpin legs
$30 for edging/plywood
$3-5 for epoxy
Total: about $135 + endless shame for not knowing how to measure properly
Not bad, not bad. It all worked out in the end so I shouldn't complain too much. The good thing about #rustic furniture, is that if you mess up, you're still good! Weird how that works.
The WOW wood from Salvage Works is really the winner here. While more expensive, it saved me a lot of time by not having to prep it before use.
I finished our dining room table and bench a few weeks ago, stay tuned for the next blog post!
If you actually read all the way to this point, thanks! I enjoy writing these blogs and I hope you enjoy reading them. It's been hella cold in Portland lately so I haven't been doing much wood working. When it warms up, I expect to be making things like cray cray.
Check out Salvage Works here.
Check out Cece Caldwell here.


